 Before | 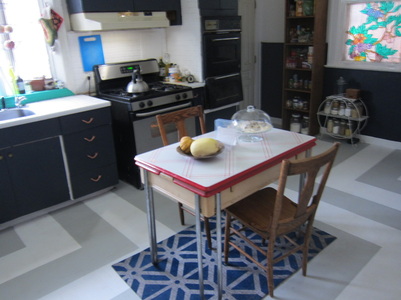 After |
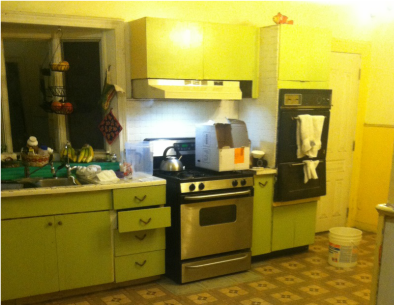
When we first got the house, one of the first things we agreed on was that the full remodel of the kitchen would be on the back burned while we fixed up the rest of the place. We have made so much progress with the house so far, we even got most of the wallpaper down now. For the first year the kitchen was working just fine. The kitchen held up for the first year, but was starting to go down hill at a rapid speed. Being that we didn't have enough to tear everything up, I turned to the internet hoping to find a solution.
As you can see, the kitchen was looking pretty rough. The laminate tile was peeling up in more than a few places, the gouges were collecting dirt, it was impossible to clean the floor. The yellow was sloppily painted on from a previous owner. I had hit my limit of looking at it! At first I looked at getting more laminate to put down, but that would cost us about $300 to do the entire kitchen, and I couldn't find anything I really loved.
Then one morning scrolling on Pinterest I saw a post about painting the floor (she does an amazing job and has an awesome site!). I couldn't believe I hadn't thought of that option! I did a little research and decided to go for it. Originally I was trying to get this project to be below 60 dollars, but things added up a little over that but I did add painting my walls using two different colors. To give you an idea of how big my kitchen is, its about 250 square feet. I got together a pallet that I liked and headed to Home Depot.
I ended up buying these things at Home Depot:
I started by cleaning the floor with the TSP. I highly recommend using gloves while doing this and making sure dogs, roommates, babies etc wont be walking through while its wet. I filled my bucket and cleaned the floor using a big sponge first. The floor was so gross but the tsp got almost all the caked on dirt up and off the floor. After the floor was completely dry, I did a quick mop to make sure the floor was spotless. Then we patched in any holes in the floor, or any of the tiles that were peeling up.
Once the floor was clean and patched in, we painted the primer. We only did one coat, some people do two, its up to you. I tried to saturate the cracks between the tiles, blending the paint back in after it was saturated. The spaces will always show a little, but this way you are little more covered. Priming always looks a little patchy, if you see any spots especially in front of the stove that is usually grease, just go over it a few times and it should cover just fine.
Then one morning scrolling on Pinterest I saw a post about painting the floor (she does an amazing job and has an awesome site!). I couldn't believe I hadn't thought of that option! I did a little research and decided to go for it. Originally I was trying to get this project to be below 60 dollars, but things added up a little over that but I did add painting my walls using two different colors. To give you an idea of how big my kitchen is, its about 250 square feet. I got together a pallet that I liked and headed to Home Depot.
I ended up buying these things at Home Depot:
- TSP - this stuff is amazing for getting that caked up dirt off floors. It also helps remove any shine that is on your tile, making it way easier to paint.
- BEHR Porch and Patio Floor paint - this stuff is built to deal with high traffic, and will have more staying power. You can only get this in gallon sizes at my Home Depot, Lowe's offers a pint size if you have a smaller space
- BEHR Paint and Prime- Works great, and honestly I haven't found any paint that works in just one application. You can by cabinet paint if you want, for this project I didn't think it was necessary
- Kilz PRO-X Paint- A more affordable white paint that covers well and goes on easy
- Kliz 2 Latex Primer- I love kliz because it goes on great, we have used it in every room. It doesn't smell too intense, and makes colors look great
- FoamPro semi-smooth and smooth surface rollers- the foam worked perfectly for us, they also work great on the cabinets as well
- Wooster Sherlock Extension Pole- Save your back! I love these things, I can get up high, I can paint the floor with ease. Helps with a smooth, even application. Buy one and hold on to it, once you use one you will want it for every home paint job!
- 3m ScotchBlue Painters Tape- goes down well, comes up easily, who could ask for anything more?
- HDX General Purpose Hydrophilic Sponge- this works great for cleaning cabinets and floors with TSP.
- A Handful of Laminate Flooring- you can cut it to fill any holes or replace the tiles peeling up
- Linzer Roller Tray Set (8-Piece)- this is a good set I have used over and over again.
- Reynolds Wrap Heavy Duty- cover your roller tray for easy, disposable clean up every time!
- Everbilt Canvas Drop Cloth- Folds up easy, I have never had anything leak through, we use these in every paint job
I started by cleaning the floor with the TSP. I highly recommend using gloves while doing this and making sure dogs, roommates, babies etc wont be walking through while its wet. I filled my bucket and cleaned the floor using a big sponge first. The floor was so gross but the tsp got almost all the caked on dirt up and off the floor. After the floor was completely dry, I did a quick mop to make sure the floor was spotless. Then we patched in any holes in the floor, or any of the tiles that were peeling up.
Once the floor was clean and patched in, we painted the primer. We only did one coat, some people do two, its up to you. I tried to saturate the cracks between the tiles, blending the paint back in after it was saturated. The spaces will always show a little, but this way you are little more covered. Priming always looks a little patchy, if you see any spots especially in front of the stove that is usually grease, just go over it a few times and it should cover just fine.
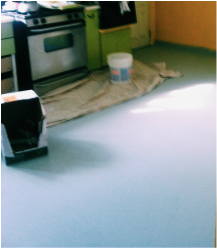
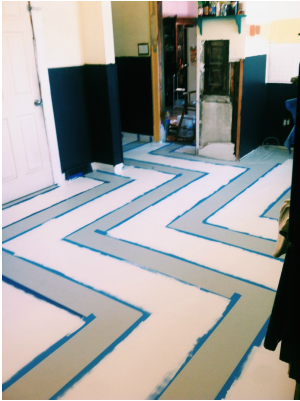
The primer had dried, we applied the first coat of the floor paint. The BEHR really did a great job of coverage on the first try. In retrospect we should have done the lighter color first. Originally we had planned on doing a black for the stripes but after we painted the walls we realized it would be too dark, so we switched to white.
We left it at one coat for the grey, only a few spots were patchy and we decided to touch them up and lay out the stripes. The stripes were easy enough to do, we just counted out the tiles and did the lay out 5 tiles per line. We tapped the stripes in with painters tape, and put down the first layer of white later that day.
The white covered ok, but we had to do another coat. The first time you paint the stripes make sure that you don't get a ton of paint on the tape, it can pull the tape up and cause the line to bleed. I avoided this by starting in the middle of the stripe and slowly making my way to the outside, and then continued to the other side. After two coats, we waited for everything to dry.
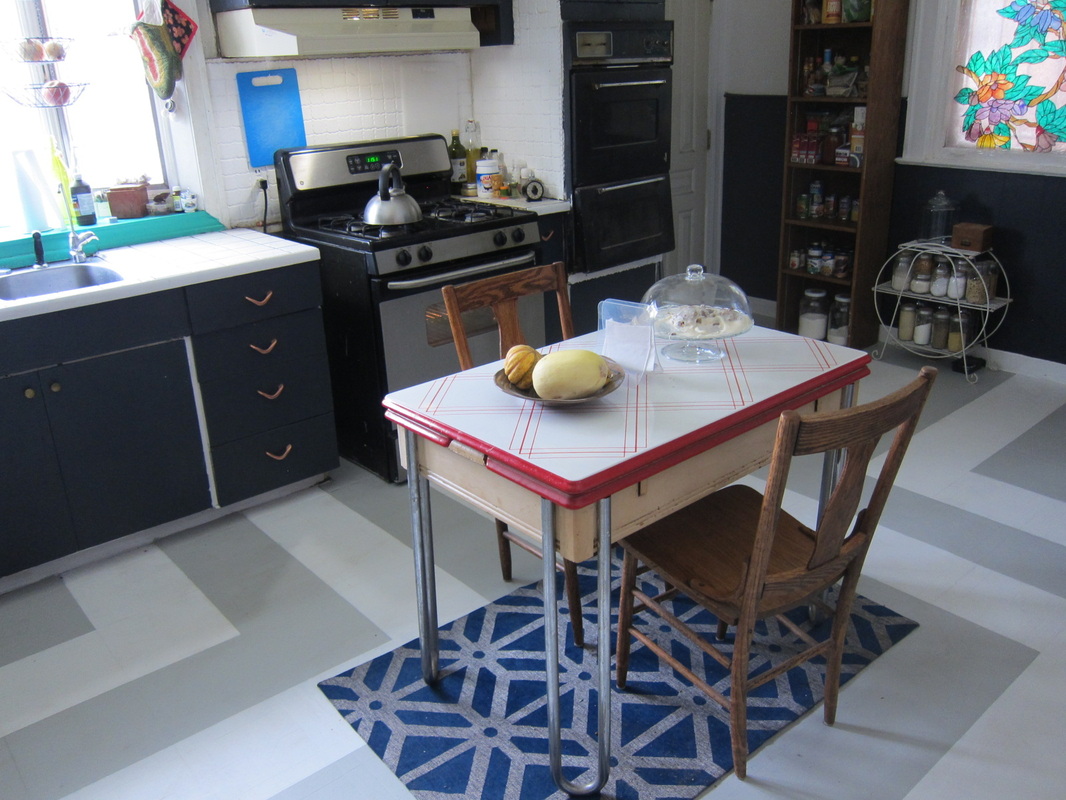
While the white was drying (the full time for the paint to dry is 72 hours), I went to work on the cabinets. I laid down a tarp and got to work. I used the TSP to clean all the cabinets (make sure you don't get the TSP on the floor, it can strip the paint when its not all the way dry yet) making sure I got all the build up off of the surface. After I let the TSP dry, I put on the first coat of paint. I used a smaller paint brush to get around any small surface and after two coats of the darker color I went back in with the white and got the insides of the cabinets with white.
I then painted the bottom half of my kitchen, which had wood paneling so it was easy for me to follow. It took 2 coats to get full coverage. Then I painted the upper half of the walls with a basic white paint we had left over from another project.
I then painted the bottom half of my kitchen, which had wood paneling so it was easy for me to follow. It took 2 coats to get full coverage. Then I painted the upper half of the walls with a basic white paint we had left over from another project.
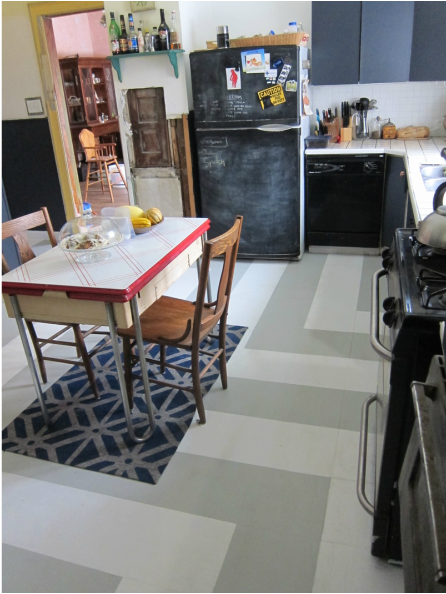
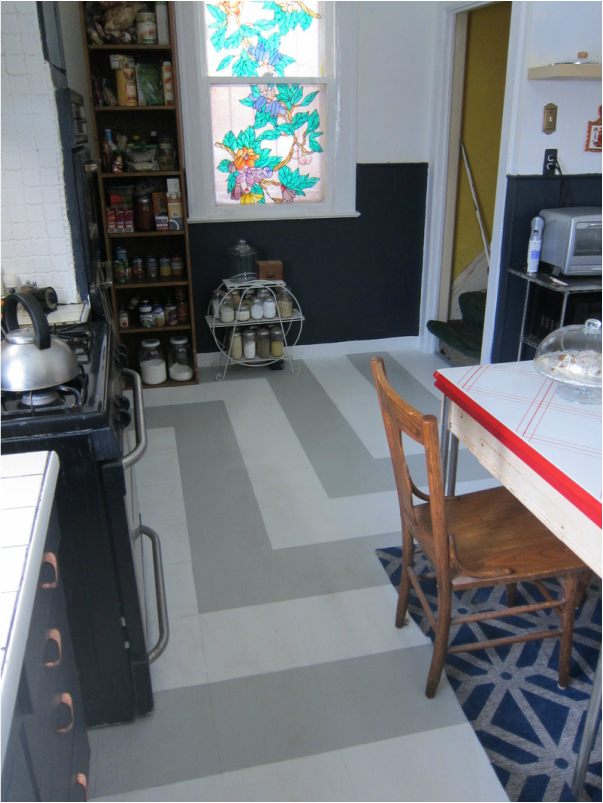
After everything was dry to the touch, we pulled up the tape and touched up all the paint that was patchy. We put down butchers paper and taped it down while it dried. That way everyone could be able to use the kitchen with out damaging the floor. The project start to finish took us about 4 days, including drying times, and a touch up at the end. For the money and time we spent, it was totally worth it. The dark color works great with our vintage copper cabinet pulls, and the white contrast pulls in the natural light. We still need to do some work, I need to paint the doors, and we need to fix up the door ways, but the end result was awesome. Plan for drying times! I would do some at night and then some in the morning each day, and it never seemed too labor intensive. If you are looking for a cheap fix for a kitchen, get to work!
A step by step guide:
- TSP the floor with a sponge, getting the corners and cracks
- Mop the floor with TSP once more
- Fill in any loose tiles or patches with laminate flooring
- Prime
- First coat of floor paint
- Put down stripes in desired pattern
- First coat of stripe
- Second coat of stripe
- Paint any walls or cabinets, making sure to remove all the cabinet pulls and any other hardware before you start
- Once everything has dried over night, put down butchers paper to project floor while it dries, pull up any tape on the floor
- After 72 hours since the last paint, pull up the butchers paper and enjoy your new floor!
 RSS Feed
